AORTIC VALVE STENOSIS
SURGICAL TECHNIQUES
Surgical Access
- The right half of the sternum is transsected into the rib interspace
- The right internal thoracic artery should be salvaged; if injured, it is ligated.
- The right pleural cavity is left unopened
Disadvantage:
- Classic median sternotomy approach.
- Minimal access aortic valve replacement via upper partial sternotomy (upper hemisternotomy)
- The right half of the sternum is transsected into the rib interspace
- The right internal thoracic artery should be salvaged; if injured, it is ligated.
- The right pleural cavity is left unopened
Disadvantage:
- Potential difficulties with insertion of the venous cannula.
- Limited de-airing of the heart.
- Difficult placement of the pacing wires and pericardial drains.
- Absence of a visual control of the heart filling and contractile during weaning from CPB
- Need for application of the external defibrillation.
- Better cosmetic appearance (shorter incision).
- Impossibility of the postoperative sternal dehiscence.
- Right parasternal incision with transsection of the 2nd, 3rd and 4th rib cartilage and IMA ligation .
- Short right anterior thoracotomy.
- Reversed Z-sternotomy.
- Upper V-type ministernotomy
- Transverse sternotomy, necessitating ligation of both IMAs (least used)
|
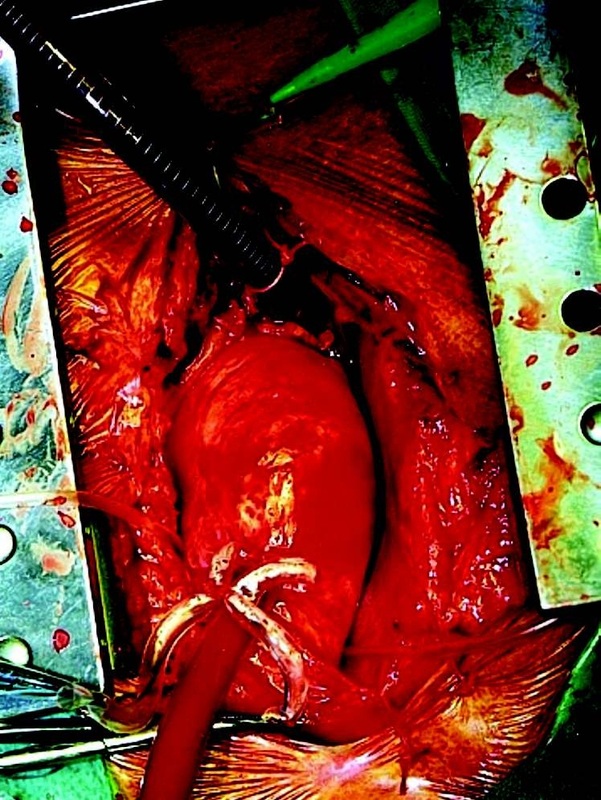
Minimal invasive approach for AVR via upper hemisternotomy. Aortic cannula is inserted in the ascending aorta and venous cannula through the right atrial appendage into the inferior vena cava
|
Cardiopulmonary Bypass:
- Performed in a standardized manner regardless of the chosen approach.
- Arterial cannula: into the ascending aorta.
- Venous drainage: a single “two-stage” cannula via the right atrial appendage into the right atrium and the IVC ( in minimally invasive approach groin vessels or axillary artery can be used instead)
- Vent: for de-airing and decompressing the left ventricle via:
- Right superior pulmonary vein into the left ventricle (most commonly).
- Pulmonary trunk.
- Left ventricle through the aortic annulus and later through the implanted valve.
- Initiation of CPB and cross clamping
- Antegrade cardioplegia via the root (1000ml) to induce asystolic arrest and later in smaller amounts directly into the coronary ostia.
- Repeated administration every 20- to 30-min intervals or immediately in resumption of electrical activity of ECG activity.
- In extensive combined procedures, retrograde cardioplegia application via the coronary sinus.
- Maintenance of constant hypothermia by topical application of saline slush
- Via a transverse aortotomy carried close above the sinotubular junction.
- Excision of the valve leaflets
- Meticulous debridement and decalcification of the annulus followed to anterior mitral leaflet if involved. This is especially important in
- Prevention of paravalvular leak
- Creates a pliable annulus that enables implantation of a bigger valve.
- A careful inspection of the annulus and the area of coronary ostia is mandatory to exclude any mobile any calcifications.
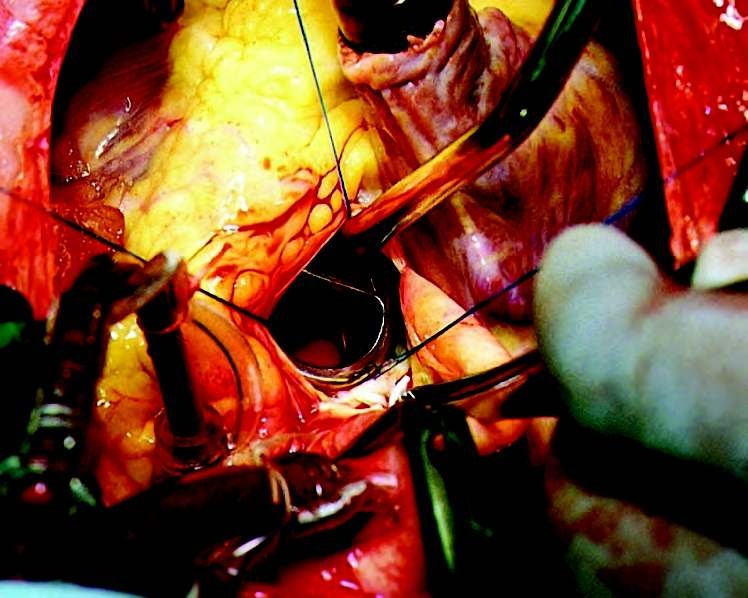
Debridement of the Annulus
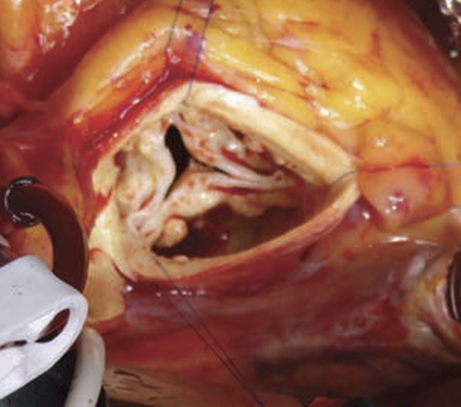
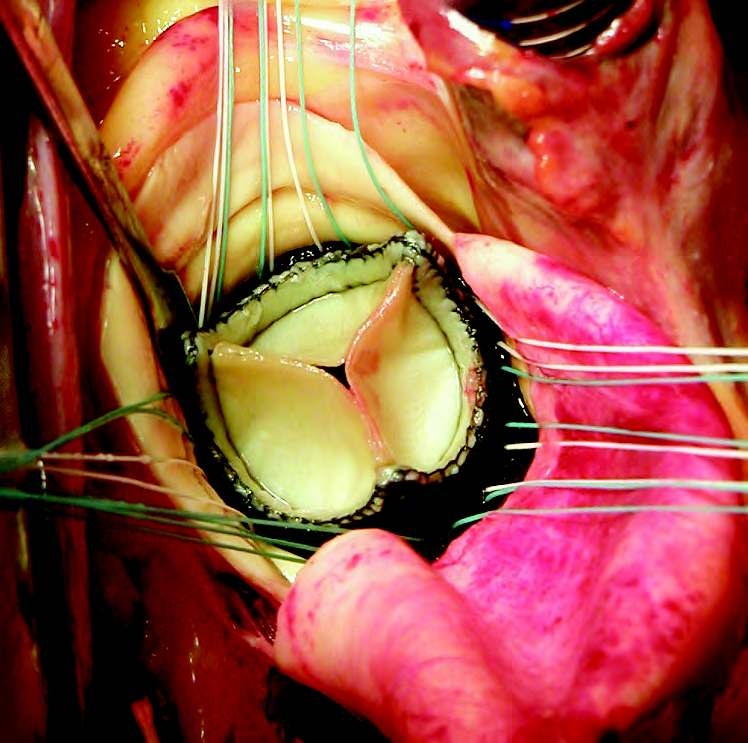
Three Retraction Sutures are used to facilitate valve exposure exposure
Debridement of the Annulus
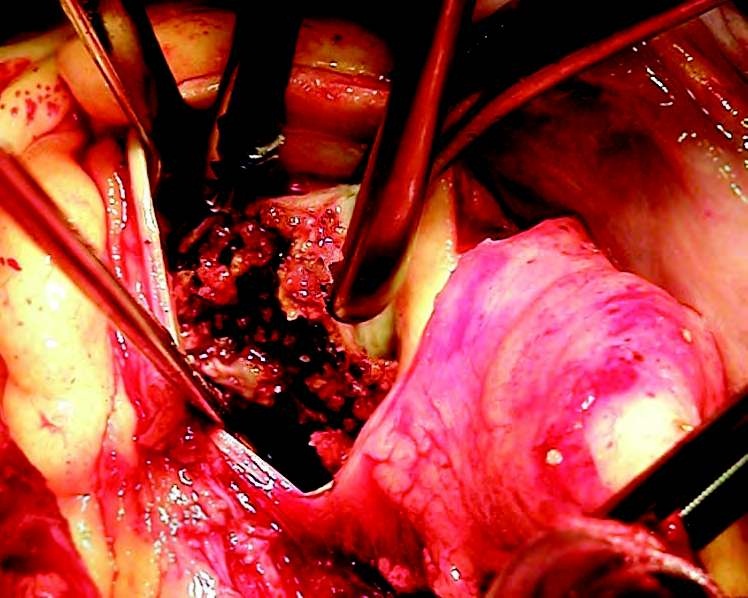
Extensive calcifications in the area of commissure between right and non-coronary aortic cusp removed with Russian Forceps

Debridement and decalcification of aortic annulus after excision of stenotic aortic valve
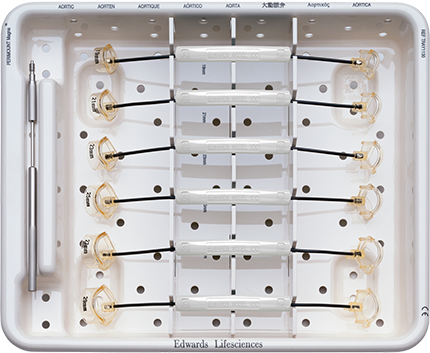
Sizing of the Aortic Orifice:
- Measured by means of sizers specific for the concrete type of the valve prosthesis.
- An effort is made to implant the biggest possible valve to avoid patient–prosthesis mismatch.
|
|
Sizing of the Aortic Annulus
Implantation Technique:
- The same implantation technique is used for both mechanical valves and stented bioprostheses.
- The stitches are anchored in the annulus and the sewing ring of the prosthesis at a distance.
- The implanted prosthesis is run down along the stitches into the aortic annulus.
- With St. Jude Medical prosthesis, the sutures tied first are those adjacent to the pivot guards to secure their correct position inside the annulus.

Placement of sutures into the sewing ring of aortic prosthesis
Suture Placement:
Prosthesis implantation can be achieved by various modifications of single or continuous sutures.
Prosthesis implantation can be achieved by various modifications of single or continuous sutures.
INTERRUPTED STITCH:

|
Interrupted Single Stitches and Figure-of-Eight Stitches
|
Pledgeted mattress stitches
- Introduced in late 1980s.
- The most commonly used technique with pledgets placed supraannularly.
- Pledgets cam be placed supraannulary or subannulary.
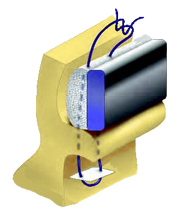
Mattress suture with pledget placed subannulary - True supraannular position
|
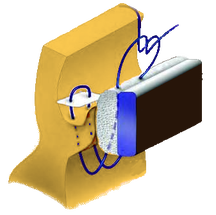
Mattress suture with pledget placed supraannulary - Inter-supraannular position
|
|
CONTINUOUS STITCHES:
|

|
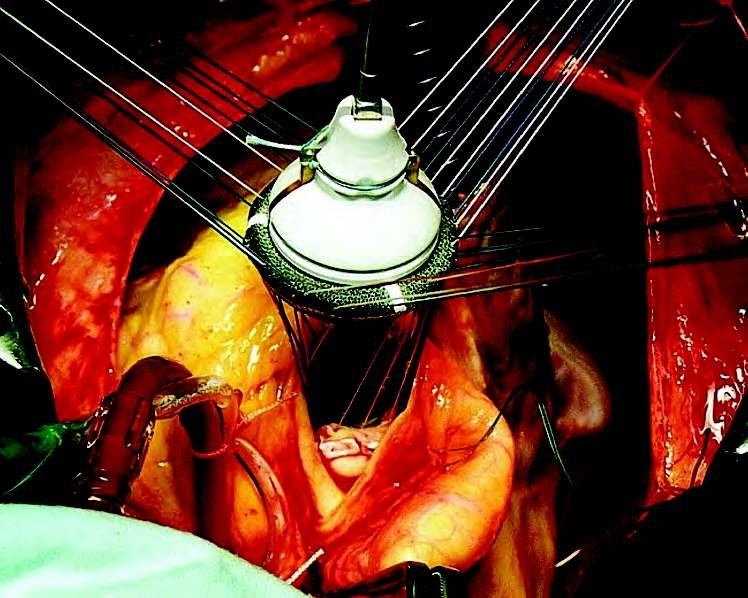
Aortic valve prosthesis after placement of all sutures before running down into the aortic annulus
Bioprosthesis Sorin–Soprano implanted into aortic orifice
Choice of Implantation Technique:
This depends on the expertise and personal preferences of a given surgeon.
Bioprosthesis:
This depends on the expertise and personal preferences of a given surgeon.
Bioprosthesis:
- Mattress pledgeted stitches placed subannulary which results in a true supraannular position.
- In large annuli: mattress stitches with pledgets placed supraannulary.
- In a narrow aortic annulus: mattress stitches with pledgets placed subannulary facilitates the implantation of a bigger valve.
Great care should be exercised:
- To avoid impressing the annulus tissue into the valve orifice (reduction of the effective orifice area and also the risk of interference with the tilting disc).
- Precise placement of the stitches in the sewing ring of the mechanical valve.
- Precise length of the cut-off threads after knotting to prevent their interposition with the closing mechanism of the valve.
Leaflet Mobility:
- The unrestricted mobility of the disc, or leaflets of the mechanical valves, has to be controlled
- In case of any uncertainty the prosthesis has to be rotated to a better position.
- All the currently used models of the mechanical valves allow device rotation.

Control of free mobility of semilunar leaflets of implanted bileaflet valve
(Sorin–Bicarbon) |

Disc valve (Medtronic–Hall)
implanted into aortic orifice Control of free mobility of the tilting disc |
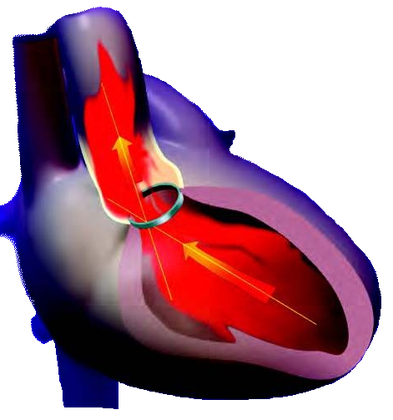
Orientation of the Valve Prosthesis :
- Proper valve orientation is required in order to get optimal hemodynamic results (lowest gradient and minimal turbulence).
- This has to respect the asymmetric blood flow pattern through the aortic root, which curves into the 140–150 degree angle between the longitudinal axis of the left ventricle and aorta so that the peak flow velocity and maximum flow output is directed toward the non-coronary sinus.
- In mechanical tilting disc prosthesis: the lowest gradient is obtained with the larger orifice of the valve is oriented toward the non-coronary sinus.
- In bileaflet valves: the lowest gradient is obtained when the longitudinal gap between the semilunar discs is oriented toward the non-coronary sinus.
|

|
Correct orientation of mechanical disc and bileaflet valves in aortic position
Aortotomy Closure
- Aortotomy is sutured with a continuous mono-filament stitch, usually in two layers in the “over-and-over” manner
- Alternatively, the first layer with the everting continuous stitch and then the second layer “over-and-over.”
- Firm aortic wall enables performance of the aortotomy suture in one layer only.
- Week Aortic wall “paper-like”, reinforce the suture with several pledgeted mattress stitches.
- After careful de-airing, the aortic cross-clamp is released.
- The onset of the heart rhythm is usually spontaneous
- Should ventricular fibrillation occurs, it is terminated by defibrillation.
- Temporary pacing wires are implanted during the reperfusion period.